
- Cable Wire Coiling & Binding Machine
- Tape Winding Machine
- Semi-Auto Wire Strip Twist Brush
- Automatic Wire Cutting & Stripping Machine
- Semi-Automatic Wire Crimping Machine
- Wire Stripper & Crimper Blades
- Terminal Tensile Tester
- Wire Cut-Off Machine
- Cable Labeling Machine
- Strapping Banding Tool
- Wire Terminals, Connectors & Plugs
- Automated Tape Dispenser
- Automatic Wire Crimp Machine
- Terminal Crimping Tools
- Automatic Wire Feeder
- Automatic Soldering Machine
- Nylon Cable Tie Machine
- Injection Molding Machine
- Brazing Welding Machine
- Screw Fastening Machine
- Power Cord Crimping Machine
- Wire Harness Tester
- Glue Dispensing Robot
- Wire Harness Packing Materials
New products


Home > Industry news
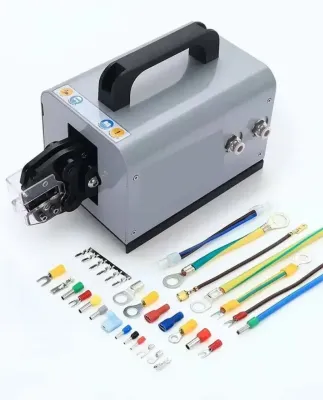
How to operate Terminal Crimping Machine
WPM-2000S Semi-auto Terminal Crimping Machine OPERATING INSTRUCTION
OPERATING INSTRUCTION
Content
Company Instruction 4
Preface 5
Notes and Warning 6
Matters to be attended 7
Technical parameters 8
The instructions and usage of the operating panel 8~
1. The function and usage method of the button 9~11
1.1Power switch 8
1.2 Panel Buttons 8
1.3 Adjustor of the converter 9
2. Instruction on the terminal crimping applicator 9-10
3. Applicator structure 10-13
4. Warranty 14
5. Manufacture Certificate 15
Semi-auto Mute Terminal Crimping Machine
WPM-2000S
Company Induction:
Our company is specialized in voyage, car, medical treatment, appliance wire harness equipment manufacturing, which is located in the High-tech zone of XIAMEN city. With 20 years of industry experience and power technology, we productive been the equipment supplier for many international companies, including Foxconn, Omron, Samsung, TCL, etc.
Our main products include Computerized wire cutting and strip machines, automatic terminal crimping machines, pneumatic terminal machines, strip machines, belt cutting machines, sub-board machines, V CUT machines, PCB cuter, molding machines, capacitors and resistor forming machines, and so on.
We get the ISO9001 and 14001certification. With high quality, our products are popular in Southeast Asia, Europe, and the United States. We provide the best sales service for clients and become the strongest production guarantee for the clients.
& Preface
Thank you for buying JINGWEI’s Fully automated terminal crimping machine. Please read this instruction carefully, use this machine base on understanding content
This instruction is not only for the first use but also for the users with operating experience to study again
Please put instructions in a convenient place.
The main contents of this manual are a survey of JINGWEI’s fully automated high-speed terminal crimping machine, main function, operating instructions, operating steps, failure response, and maintenance.
If you have any questions on purchased equipment and the content of instructions, please contact your dealer or our service center.
Note:
When the machine is sent to your company, please check:
1 If there is any damage during the transport process
2, If lack of accessories of mismatch.
3, If the label content is consistent with the items you ordered
& Notes and warning:
warning
Here may give rise to a risk of injury and personal note
Please fully comply with the marked item
Notes
May be put away in the operation of plant and equipment damage considerations and
restrictions, Please be sure to read the term carefully to prevent
Safety Precautions:
In the installation, operation, maintenance, and inspection points, please read this manual. In addition, only professionally qualified staff can carry out assembly work.
Instructions in the safety precautions are divided into a "warning" and "attention".
warning
Said the possible dangers, such as neglect can cause death or serious injury.
Notes
Indicate a possibly hazardous situation, failing to rule out a smaller injury and equipment damage. So, reading this manual should be carefully re-use of equipment.
General Note: all equipment before leaving the factory did complete functional testing, post-box please check the following items in sequence:
Among the types of equipment, the machine whether the model you ordered.
As a result of transit operations, do not wire power transmission.
& Matters to be attended
1. To set up in the stable or no vibration ground or table, should be in a space radiate well
2. Basic power to 220AC electricity, and use the machine with a dedicated power plug。
3. Use the dedicated wall outlet, and make sure that the proper operating temperature (is 0-40 degrees Celsius).
4. It must be pulled out of the power plug and use the machine tools dust cover when without using the machine for a long time.
5. Do not set up and installed in places where the high temperature。
6. Must not modify machine and transform control circuit and so on, that will cause malfunction like the two sliders falling malfunction.
7. Safety devices or the board should not be moved, the installation location can not be changed.
8. Be connected to water before properly using the machine.
! To ensure safety, you must be connected to the ground wire using a dedicated outlet. This machine is the wire terminal assembly of a dedicated terminal machine, and should not be used for other pressing work.
&Technical parameters
Technical parameters of WPM-the the 2000S
Item WPM-2000S
Measurement L330, W330, H660(mm)
Crimping press 2Ton
Weight 63KG
Average power consumption 0.45 KW
Motor power 0.75 KW
Power source: 220v/50Hz/60Hz
Travel: 30mm
1. The instructions and usage of the operating panel
1 Power switch: ON---Turned on the machine.
OFF---Cut off the electricity, machine stop.
2 Light: Pressing the button will turn on the light, and repressing it will off.
3 Counter: Count the crimping times.
4 Zero: The counter number is returned to zero.
5 Signal light: In the Manual state, the light is red while in the Auto state the light is green.
6. Auto/Menu: Machine working state switching button. Red is Manual and green is Auto. In AUTO stade machine works automatically when you press the pedal switch.
7. Manual up: Button for adjusting applicator blade moving, When the signal light is red, press this button, and the applicator will rise, while rising to the highest point, due to the automatic callback function the applicator will be reduced. General use this function when adjusting the applicator.
8. Manual down: When the signal light is red Press the button, and the applicator will turn down. When the applicator turns to the lowest point, it will rise. General use this function when installing the applicator and testing the crimping effect.
9. Reset: If a machine can not work normally can use this button to reset the machine.
2. Instruction on the terminal crimping applicator.
First operation
A. check whether the power supply is AC220V 50HZ
B. whether there is the earth wire
C. If the power wire is in the act, check if there is cracked rubber if the joint connection is dropped out.
D. Check whether there is a foreign body in the machine running part, or abnormal sounds
E. Give oiling to the parts which need to add lubricant. modify
F. Connected to the gas source, pressure over the 4KG
Connect power supply
G. Plug with a ground wire of three plugs, electric control box.
Operating conditions confirmation
H. If the wire is connected.
Note
J. When the machine is in operation, it is not allowed to touch the moving parts
K. When checking, turn off the automatic mode, single-person operation.
3. Instruction on the terminal crimping applicator.
First operation
A. check whether the power supply is AC220V 50HZ
B. whether there is the earth wire
C. If the power wire is intact, check if there is cracked rubber if the joint connection is dropped out.
D. Check whether there is a foreign body in the machine running part, or abnormal sounds
E. Give oiling to the parts which need to add lubricant.
F. Connected to the gas source, pressure over the 4KG
Connect power supply
G. Plug with a ground wire of three plugs, electric control box.
Operating conditions confirmation
H. If the wire is connected.
Note
J. When the machine is in operation, it is not allowed to touch the moving parts
K. When checking, turn off the automatic mode, single-person operation.
3. Applicator structure
3.1 Function of the Terminal Crimping Applicator:
A. Terminal applicator is developed for measuring cutting and crimping.
B. WPM-2008A2 is only suited for terminals mold (AS42) type.
C. When installing AS40.AE30 or Terminal applicator of other company, please process at the LONG applicator
Note: When installing Terminal applicator (AE30) or others, to correspond to optional shopping.
Terminal applicator
3.1.1 Installation.
Note: Make sure to confirm startup switches is OFF (green light off) before installation.
1) Use the terminal base and terminal mold machine mode-locking bar, you can install and operate terminal mold separateness.
Terminal applicator locking bar A
Terminal applicator locking seat
Terminal applicator locking bar B
2) Pull up the forward single operating terminal machine lock bar B, and pull out the terminal machine lock lever A in the direction of the arrow.
Locking bar B
Locking bar A
Terminal locking bar B
Terminal crimping bar
Terminal locking bar A
Terminal applicator
Terminal applicator seat
3). Move the terminal mold on the terminal base seat thoroughly to promote the seat until balanced with the terminal base seat.
4). Insert terminal machine lock bar B, and press down.
5). Terminal mold was fixed and the completion of the centering was.
3.1.2、Adjust the height of crimping
1) Confirm whether the number on the terminal machine mold crimp height dial is 2。
Note:
A Scale on crimp height dial, engraved with numbers 0-9
B Standard is two, the height of the curl will increase by 0.05 MM when increasing one number. Turn the power switch to manual crimping.
2) When changing the height of crimping, pull out the crimp height dial button, and pull the button in when the number reaches the top.
3) When the scale locate at 2, change the crimping number, and the input value is from 0.01 to 2.0 MM
Note: The input value of 0.00 is the highest location of crimping
Warning:
A non-Crimping height data, please settings to 0.50 to
hammer temporarily
B Measure hammer temporarily sample with micrometer
and then set the appropriate height
Reference: set value is activities of each paragraph 0.01, but it is
only a baseline
3.1.3、Adjust insulation height
1) Adjust the insulation height with the Insulation dial after adjusting the crimping height.
2) Operation is the same as crimp height dial. When changing the insulation height, pull and twist the Insulation dial, Press the insulation back when the number reaches the top.
Reference:
A. Scale of insulation dial, engraved with the figures 1-8
B. Increase one number, and insulation height will decrease by 0.1 MM
Terminal applicator
3.1.4. Terminal feeding equipment
Adjustment of terminal feeding equipment, carried on by adjusting screw, as figure shows. The terminals move forward when the screw is twisted to the left, and turn back when to right.
※ Remember to tighten the bolt after adjustment.
Terminal applicator
Side feeding(AS42)
Note:
1) Supply applicator, pre-adjust feeding.
2) Confirm the JN01detector before working.
USER GUIDE:
The warranty is one year from the date of purchase, consumables are not within the
Warranty (including triple combination, gas fittings, solenoid valves, blades, etc.).
2. The following conditions are not within the scope of the warranty:
1) Error operation, negligent use, and equipment damage caused by natural disasters.
2) Abnormal operation leads to mechanical failure
3) Have been disassembling or repairing the machine by a non-company technician
4) Damage caused by the use of non-company consumables or accessory
5) Damage caused by the use of non-company voltage.
3. Except for this guarantee, a warranty card send by any other company or individual, is
not recognized by our company.
4. Please keep this card and the proper official purchase receipts, and show them to company's
lapses
inspection.
5. If there is no firm seal and purchase date of purchase, the guarantee automatically lapse.
link : 中文 | Русский | Français | Español | English | العربية | Deutsch | 日本語| Nederlands| Português|

×

Scan to Chat
🤖 AI Assistant
×
End Chat & Send Transcript
Contact Us
 sales@cablecutting.net
 kevin201166
 +86-18965153335